

I was so drawn to all the pretty labels and containers she used but, like she said, it didn't feel conducive to an easier life; which, after all, is the entire purpose of organizing. Apart from that, I felt there had to be a better way to designate specific areas of the fridge to certain things without committing to specialized labels that I would either A. have to pull off and replace later (and wasting money/ materials by doing so) or B. only use when that type of item was in the refrigerator.
So, there I was, in dire need of a fridge makeover (and cleaning!) but lost on how to go about making it happen in a hassle free way and without costing me an arm and leg (anyone else biting nails at BPA free Tupperware prices?). After about a month of coming up with little to no ideas, I all but gave up on my hopes to have an organized fridge.
That's when I found these babies at Staples

Chalkboard sticky labels. Even better than finding them was their price tag! $6 for 15 of them! HOLAA! So, with a bit of cash in my pocket and a renewed devotion to getter done, I headed out to find containers to slap these suckers on. Eight bucks and a bit of elbow grease later I was left with a happy, cleaned, and most impotently, organized fridge!

Like under my bathroom sink , I grabbed most of the containers from the dollar tree, the rest I already had.
Here is a closer view at what this beast looked like prior to getting its act together.

Note the overly crowded bottom shelf and the overly packed butter compartment which, at the time, was packed with old, bad cheese...eww (did I mention that it was in serious need of a cleanup?!).
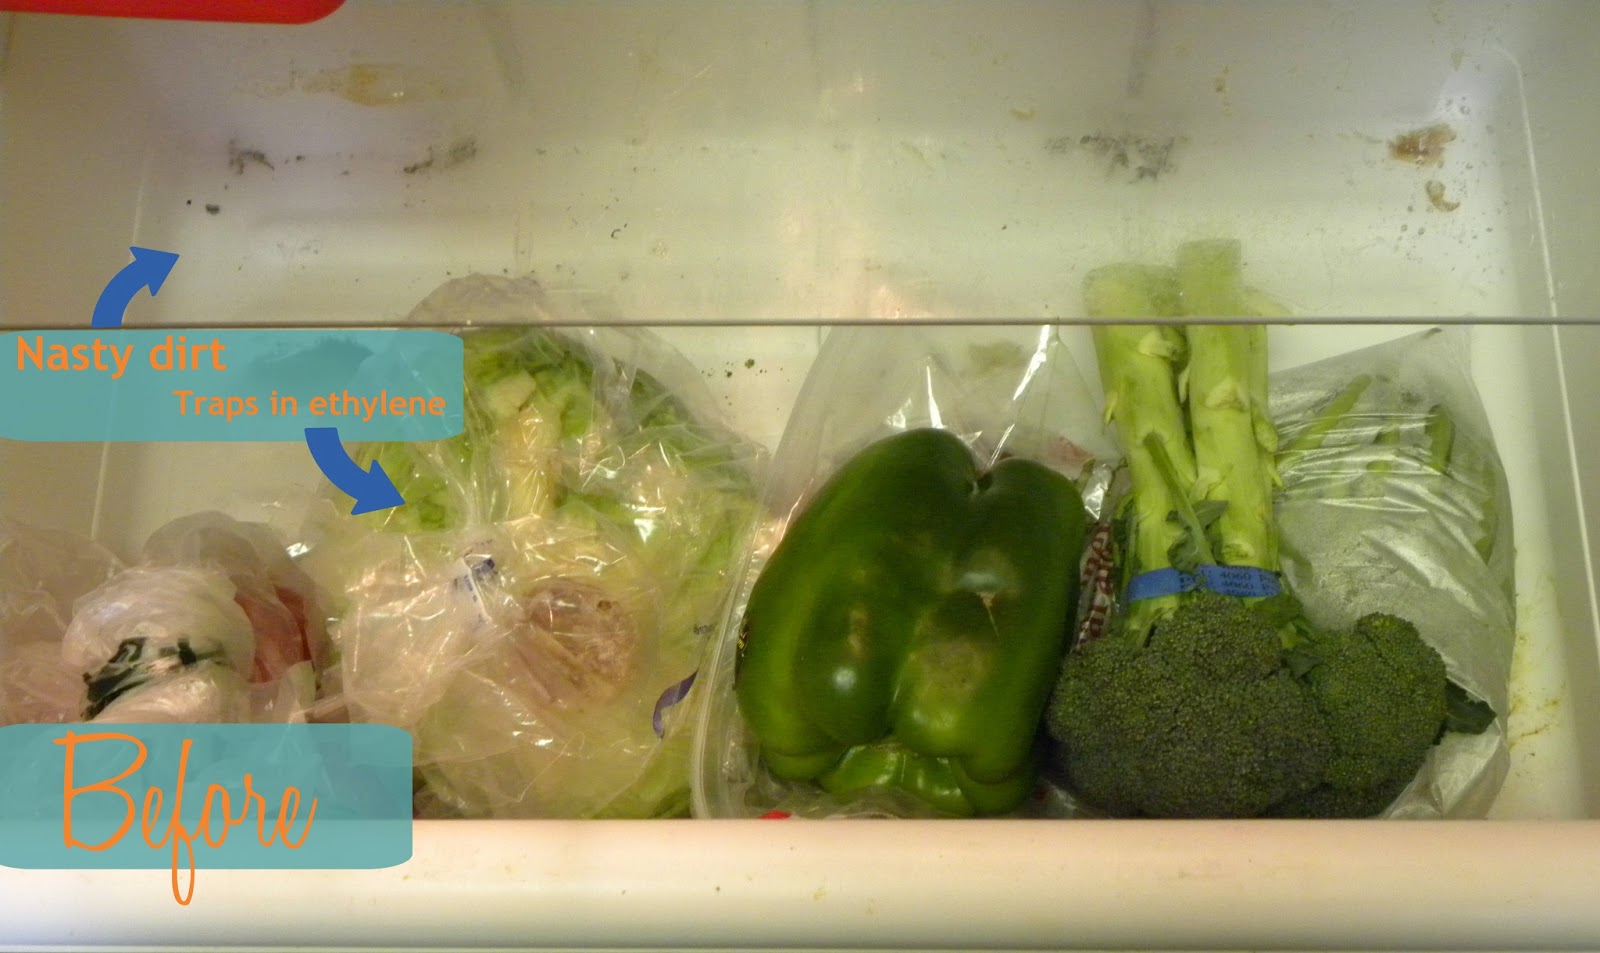
The veggie drawer was so dirty and nasty I honestly wonder how we hadn't gotten sick from the food in there. On top of that, all the wrapped bags promoted ethylene gas build up (which causes food to ripen quicker and therefore go bad faster) so half our fruits and vegetables would go bad before eating all of it. Yeah, major fail!

Because our condiments, toppings, and bad cheese was talking up all the prime real-estate that is the fridge door, the drinks got shafted to the shelves but, because they are too tall for the shelves, they were haphazardly laid there. Oh, and see the plastic bags, yeah, that's pizza dough that was not put in a plastic container like they should have been but plastic bags instead... gotta love the Hubby -.-.
As you can see here, I already had two plastic containers that I was using for greens (they make the most ethylene) and one for meats in my first attempt at getting the fridge more organized and less meat-juice laden but it obviously wasn't enough and I hated how the hubby never knew were things were even when they were in containers.

It is such a relief to be able to find things now. Not just me but Hubby too.... without me having to yell across the house were something is :P.
After throwing out all the bad cheese, I was left with three small, manageable zip locks of opened cheese (that are still good). Maybe later down the road, I'll find a way to keep them all separate yet together but for now, I am just pleased to have the rest gone and everything else in the fridge in order.

Thanks to two baskets that fit on the shelf; I finally had room to put the drinks where they belong! Since all the cheese was thrown out (but the three good ones) the butter compartment could also finally do its job. With clutter gone, old things thrown out, and space savvy organizing, I even have leftover room that's not used on all three compartments!
Here is where those condiments and toppings went after clearing out the fridge door. The one on the left is toppings and the one on the right is dressings and extras (like jarred olives and cherries).

On the second shelf, I used a basket for the eggs. I know this is unnecessary to some but I hate opening the egg carton after going shopping to find that I only had two eggs left. I already had this basket on hand and figured, while I was organizing things, why not use it to make them more visible. The basket on the right was one I snagged at the dollar tree and popped a chalkboard label on. The best part about the labels is that I don't have to worry about what’s in the basket; if I run out of dairy product to put in it or don't buy any next shopping run (not likely) then I can just wipe it off and change it to whatever will go in there next!


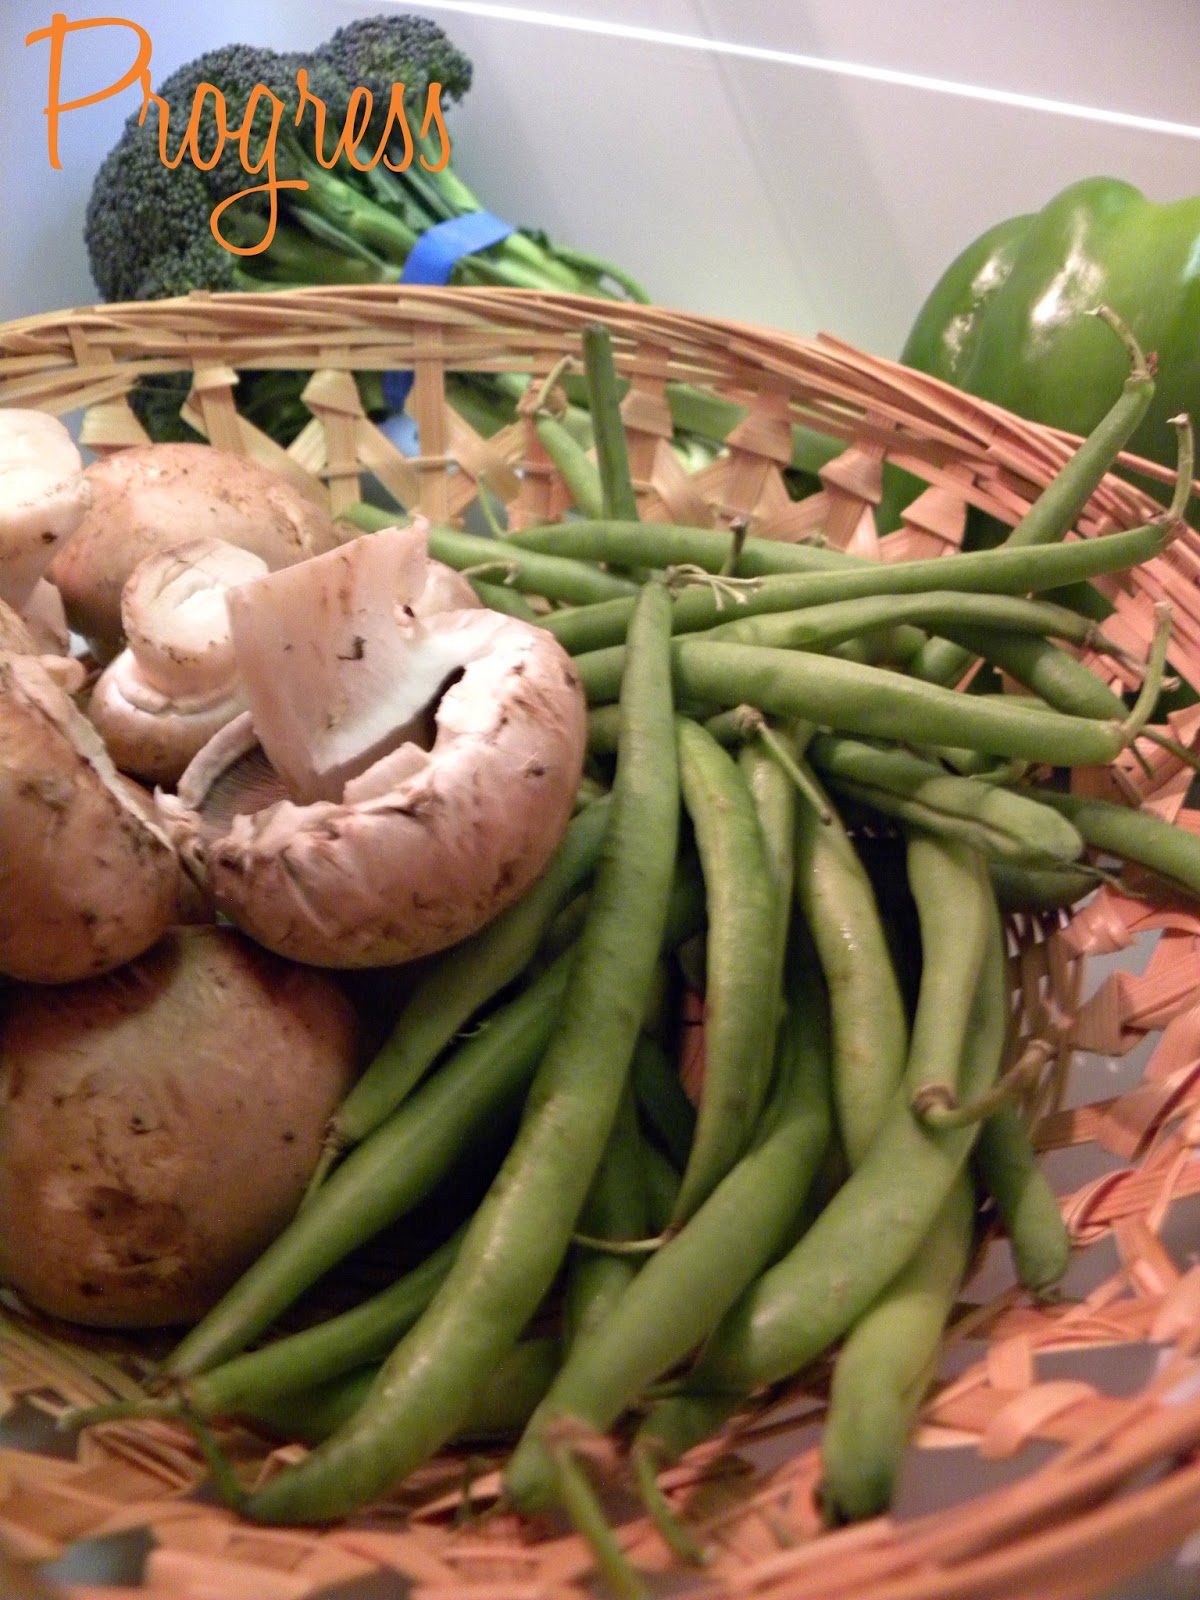
On the bottom shelf I kept the two baskets I already had in there but added labels to make them more visible. I also added in one more basket for veggies that are half used so they take up less room in the vegetable drawer and are more visible so that they will get used sooner.

In the vegetable drawer, I used baskets I already had on hand to separate the fruit from vegetables. Because the baskets are loose, they prevent off-gassing while keeping them dry an off the base of the drawer. The baskets also make things easier to see and, honestly, prettier.

Here is the price break down
One pack of 15 chalkboard labels -$6
Two small, handled baskets for condiments- $2
One container for greens-$1
A basket for dairy-$1
Two baskets for produce- Free (already had/ given to me)
An egg basket- Free (already had/ given to me )
A container for meat and veggie bits - $2 (already had)
Total : $12!
Here is the before and after side by side... you know, so you don't have to scroll up; because I love Y'all.
 Happy organizing!
No comments:
Post a Comment