Friday, November 4, 2011

A Jaring Situation

After months of cleaning and stocking up on glass jars from all the spaghetti sauce, salsa, and such we eat, I finally had enough to finish a project with them!
I decided to up cycle them and use them to store goods in my pantry so I have less messy bagged items and more pretty/ smaller glass jars of stuff.
I found this cute label online and, just like with my porcelain plates, I traced it from my computer (still no ink in the printer :P ) and cut it out on some paper to make a stencil.
 I actually wanted to use a smaller version for the smaller containers and a larger one for the bigger ones so I just zoomed in on my computer and traces a bigger version of the same label. (so they all match in my cupboard).
Then, I duck taped the entirety of my jars. Using the stencil, I cut out my labels from the duck tap with and x-acto blade.

Then I just primed it all. The lids of the salsa jars had writing on them that I didn't want to show, so I decided to forgo taping them up and opted for them to stay primed. I might use some red spray paint on the lids sometime later, but for now, I like them just the way they are.
After waiting a few minutes between thin coat of primer, I used one of these little sponge applicators (I have no idea what the real name of them are) that I picked up at Michel's for like 80 cents a pop to paint the stenciled area of the jars in chalk paint.
You can get chalk paint at any hardware store or make you own in any color using this tutorial from prudent baby that I found. Just before the paint is completely dry, I peeled the duck tap off and vuala!
The best part is that when something runs out I can just clean out the jar, fill it with something different, and change the label with chalk! I love it!
So what projects have you guys been up to lately? Anyone have any super handy storage ideas to share? are you excited for the weekend?

Thursday, November 3, 2011

Just Treats

For Halloween this year I decide to do something a little special for the kids.
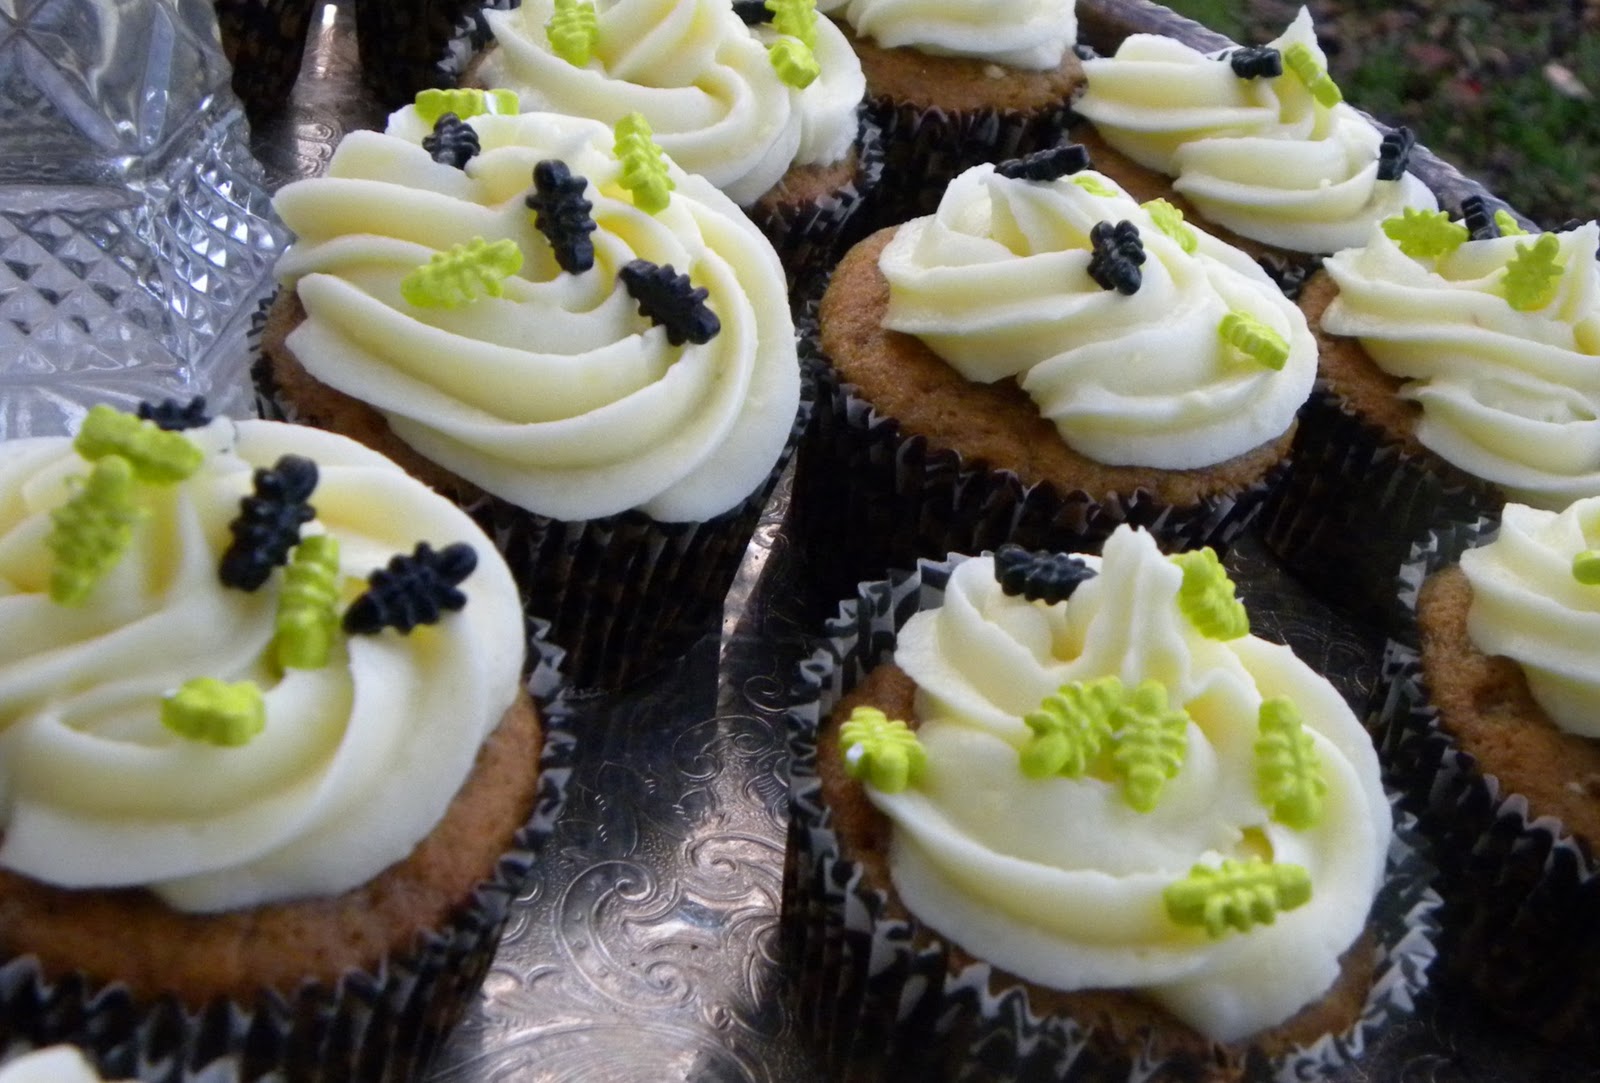
I made cupcakes! I know not all parents would agree with their child getting a cupcake as a treat (and I wouldn't want them to look like the bad guys for not letting them have one) so that is why I also decided to give out candy on the side so that parents have the option.
All in all I only gave out 10 cupcakes out of 9 kids. Which is actually a lot for an apartment complex.It might have been due to the fact that I sat out by the entrance of the apartments and my hubby adorned me in "ambiance", but I like to think that its was simply for these amazing cupcakes.

 So, I thought it would be nice to share the recipe with you all so you can have a Halloween treat yourselves ;) . Enjoy!

You will need: an electric mixer,one small bowl, two medium mixing bowls, one large mixing bowl, a spoon, two cupcake pans,and cup cake sleeves (two dozen).
  • 2 cups flour
  • 1 T spoon baking soda
  • 1 T spoon baking powder
  • 1 T spoon sat
  • 1T spoon cinnamon
  • 1 T spoon ground ginger (or 1/8 T spoon fresh grated ginger)
  • 1/4 T spoon ground nutmeg
  • 1/4 T spoon all-spice
  • 1 Cup packed light brown sugar (de-clumped)
  • 1 Cup Sugar
  • 1 Cup (2 sticks) unsalted, melted butter
  • 4 eggs lightly beated
  • 1 can (15 oz ) pumpkin puree
  1. Preheat oven to 350 F. line cupcake pans with cupcake sleeves.
  2. melt butter in the small bowl in the microwave.
  3. meanwhile, mix the flour, baking soda, baking powder, and spices in a medium mixing bowl.
  4. In the large mixing bowl, whisk together the eggs, both sugars, and melted butter.
  5. Add in the dry ingredients and mix until its smooth. Add in the pumpkin puree and mix again, until smooth.
  6. Divide batter in the cupcake pans and bake for 20-25 minuets.
For Cream cheese Icing:
  • 2 Sticks of butter
  • 2 packs of cream cheese (16 oz)
  • 3-4 Cups powdered sugar
  • 1/8 T spoon vanilla extract
  1. Mix in the other medium mixing bowl, with the electric mixer, on medium, the butter and cream cheese until smooth and has no lumps.
  2. add in the vanilla and mix again until combined. Then add in the sugar and mix until icing is formed.

Wednesday, November 2, 2011

Pretty Pinings

Oh my goodness! I am so excited to share with you all what I did for the Pinterest challenge!I feel like a little girl telling her mommy about a preschool crush and OH am I crushing on these!
I found my inspiration from this Pin


Isn't Ashley so creative!? And she got the idea from Martha Stewart! Oh what an amazing, creative world we live in!  I can't wait to see what everyone else has come up with. Today's going to be a juice stake of creativity, DIY, crafting bit of eye candy for sure! So are you ready to find out how to make your own bit of eye candy?
To make these all you need is a porcelain plate, a porcelain paint pin (you can find these at Michel's in a lot of colors or any arts and crafts store), an oven, and a stencil.
Instead of buying a stencil I actually made one by finding one off of the Internet and then tracing it off my computer screen (because my printer was out of ink).
I then used an x-acto blade to cut out the shape.

I actually only used the larger stencil because I didn't like the way the smaller one looked on the plates.
Once I got the stencil cut out I taped it down to the plate and then colored over it with the porcelain pin ( you can also use porcelain paint that they sell in a jar). When I was done I peeled off the stencil and did a little bit of touch ups. Then I have to let then sit and dry over night which is according the the packaging on the pin. (what ever brand you get it may be different then that).
After waiting a day (which felt like a year) I baked them in the oven at 300F (this also may vary) for 20 minutes. During this time you can pace back and forth, color in a coloring book, watch a show, or just sit impatiently. :) When the 30 minutes are up you just take them out and let them cool. At this point I did a little freak out dance at how awesome I was and how good they look. I also may or may not have koodod my self a few times and gloated at that hubby about my awesomeness.

So thank you Ashley and Pinterest and I can't wait to see what Kate, Sherry, Ane White, and House of Earnest have created for their challenge.

Monday, October 31, 2011

Cannibal carvings

Pumpkin carving is sadly not my husband’s favorite thing (by far) but this year he was actually willing to pick in and have a little creative moment with me (ok, so I begged him to help... but he gave in so that's something : P). This year I got a bit of inspiration from some stuff I found on pinterest (aka the DIY addicts site).


We weren't so sure about the idea of have a little pumpkin in the mouth so we came up with the idea of the little pumpkin sitting next to the bigger one.
 To make the whole scene we made it so that the larger pumpkin foaming at the mouth and sort of looking at the little one as if to say " I will eat you"!
 We thought it would be funny to make the little one have more of a cartoony/ innocent face and looking up at the rabies induced cannibal with wide eyes and screaming (I know, we're so twisted sometimes).

Hope you like them, and happy harvest!

Friday, October 28, 2011

snakes and blood and spiders oh my!

In preparation for the season I decided to create a little table scape. Which, with the exception of the pumpkin, was completely free stuff I all ready had or made of stuff I already had!
See that black thing? If you can't tell, its a spider.

A spider that the Hubby made out of wire hangers ( We're not exactly wire hanger kind of people so I was happy to see them go) that I then sprayed with some black spray paint we had around. And while My babe was doing that... I was doing this
Ok, so we know who has the wire crafting jeans in the family :P But in my defense, that wire was really tough to work with! I also made these  bleeding candles with the half-a-candle from when I made my fall wreath and anther one I got at the same time just in case one wasn't enough.

All I did was burn the candles for a little bit to make them looked used and a little older. Then I dripped a bit of red wax (from another candle I already had) on the tops of them to make them look like they were bleeding. Of course I played with photo shop a little to make them look spookier but they look great even without the ambiance.
Other then adding a few leaves, a tray, and a strip of burlap, that's it!
Have any of you jumped in the fall spirit and created a table scape? What about any fun fall crafts? Have any one been bettered out on a craft by a spouse or friend but it wall worked out in the in? Who's ready for some of there kids candy!? Or are you just chilling out at a harvest party this year or having a howl of a night (pun intended) with a bunch of friends over?

Thursday, October 27, 2011

Homearamathona

During the weekend Hubby and I went on a little adventure... house viewing! We, unfortunately, weren't looking for our first home (which is happening soon ;D ) no, we were viewing this years lovely homearama home that were down in Suffolk, VA.  Me and my mother go every year and it is so nice to be able to just hang out with family and to be able to bring the hubby. There is just so much inspiration in the homes; and, although a lot of them were painted boring dull tan on the inside, they still had a lot of good idea that me and my man grabbed in photos for our future home. I took quite a bit of photos so here's a few for you all to enjoy... (warring, photo dump ahead)

We just loved the rustic look of this table and think its a awesome idea for outdoor furniture... nothing says laid back like rustic wood!
This is SO a do-it-yourself project in the making... if I can get my hands on a bunch of drift wood and a little mirror... what do you thing?
This is another awesome DIY project that I'm so going to do! Its a napkin ring that I though looked like coral.
How cute is this little guy. I could also totally see him spray painted white ( I hate admitting that because my Darling says I have a white spray paint addiction).
This is yet another great DIY idea... if you know how to sew. You can actually buy a pillow case that has a center strip like this one and then sew what ever type of beads your heart desires. Personally, I like these kinds of beads but maybe on a burlap pillow. Can you tell I'm ambitious to DIY any and everything possible... hey, the way I look at it, its cheaper, fun, and creates a since of pride and memories; so why not! :)
The Hubby actually like this outdoor love seat! which if you know my sweetie, getting him to like anything wicker is like pulling teeth out of a crocodile! hopefully when we get a house we can find one just like this. :P

I'm not sure what it is about these adorable little critters. Something about them is just so darn charming!
Of course I had to take a photo of a few birds. Its like every house we went in John had to say " Oh look, the put a bird on it". i should have NEVER shown him this video! but, alas, I do love birds -.-.
How cute is this faucet handle!? I told the Hubby it reminded me of Micky mouse's cloves. Doesn't it!?
Here's one more DIY idea just to finish things off. Well, that's if folks. Hope this got your creative and design juices flowing... it sure did for me. Now get off the computer and go have some creative fun! ;)

how did you all spend your weekend? Did anyone else go to homearama? ( other then you... mom) If so what were you inspired by? Did anyone conquer a DIY project over the weekend? or did you just hang out with the ones you love and soak in some of that beautiful fall air? Hope you all had lots of fun!


Wednesday, October 26, 2011

pinundrum to posted!

Oh boy do I have a treat for y'all! I'm taking the pinterest challenge that going on at Bower Power, Young House Love, Ana White, and House of Earnest. Oh yes, I'm sure these ladies will have me beat with pinning awesomeness but even the littlest fish in the sea have their moments... at least I'd like to think so. So jump on the band wagon if you have a blog.... you know you want to . And show us how you took your pinundrum and turned it into something totally you! ( Pinterest didn't do anything to deserve this post other then being created and inspiring me to get off my computer and live life... oh.. and make fun/cool/ life improving stuff! ) And just because these two girly's make me laugh-so-hard-I-feel-nervous I wanted to post ( I stole it from sweet Kate ... hope you don't mind doll ) this so you can all join in on some nervous awkward laughing too! aren't I a sweetie.


It’s Back! The Pinterest Challenge was such a fun motivator for all of us this past summer and so we thought it would be a good way to get a proverbial autumn bonfire under our rears to get something done this fall!

This time we have a few new hosts joining Sherry (of Young House Love fame) and me - so let’s make sure to show them some love – group smooches goes to Ana of Ana-white.com and Erin of House of Earnest!
Yup – this time around it looks like a brunette brigade…and if you don’t have these three gorgeous girls in your reader, well, you are missing out. Get on that. Like now. Like yesterday. Like 1981.

And for anyone that missed the Pinterest Challenge last time – here’s what’s what:
We all heart Pinterest. We pin inspiration all the time. Stuff we want to try to make ourselves but before the DIY train leaves the depot, it gets stuck on our boards and never gets done. So this is a public challenge. One that gives us a steel-toed-boot-in-the-derriere to make our pins come to life. We are planning on posting our completed projects in one week – on Wednesday, November 2nd. And you are very welcome to join in on the fun.
Here’s how you bloggers can play along:
  • Like the wacky photos said – pick your Pinspiration project. Do it. Blog about it. Celebrate!
  • In your blog post, we ask pretty please for everyone to share the link love! Link to the Pinterest item, the ORIGINAL source of the inspiration photo on Pinterest, and it would be soo nice if you also linked to the four Pinterest Challenge hosts above (you have no idea how much we appreciate the linkage love too!)
  • Linky Party at the Bower House! Each host has the option to linky party - so if you blogged about your project, link up with us too so that we can all see your completed projects and we can share it to our readers.
  • Have fun! No matter what the project is – it can be small, big, super-sized, seasonal, decorative, cooking, crafty – anything goes…just as long as it “Pinned then Spinned” you can consider us fans!